Placements
Overview
A placement is an individual location on a site where Algonomy Omnichannel Personalization content, such as recommendations and promotions can be shown. Placements can be assigned with one or more layouts. These layouts dictate how the content within a placement appears on the site. One placement can be applied on a variety of page types. For more information on layouts and page types, please speak with your Algonomy Client Services Engineer.
Note: There may be multiple placements on a single page, but each placement must execute a different strategy.
This topic is intended for those who will be setting up the placements and layouts on a retailer's site.
Understanding Placements and Layouts will help the retailer to make better decisions regarding what content to display and where on the page to place it.
It is important to understand that while multiple placements can be placed on a given page, each placement must use a different strategy. A strategy can be executed only once per page type (per request).
How it works?
The Placements UI provides a self-service tool within the Omnichannel Personalization dashboard that lets you efficiently manage placements and recommendation layouts.
Through this interface, you can:
-
Add, enable, disable placements
-
Add, edit, delete layouts for placements
-
Filter placements by Recs, Promo, and/or disabled layouts
-
Compare the states of QA vs. Production
-
Publish settings in QA to Production
Setting up Placements and Associating Layouts
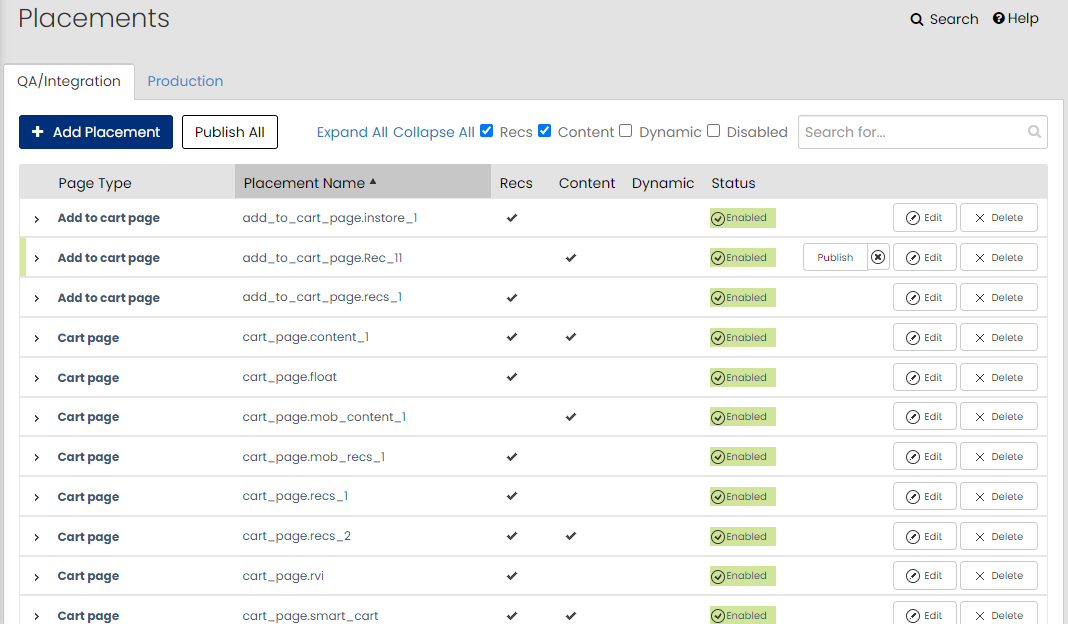
To create or modify a placement, in the Omnichannel Personalization dashboard, go to Site Configuration > Placements. You will see a list of placements, each with a drop-down arrow that shows the associated layouts.

To create a new placement, click Add Placement. This window opens:

Use the dropdown to select the page type. Create a descriptive name for the placement. You can only fill a placement with recommendations or promotions.
IMPORTANT: Placement names cannot be duplicated. Placement names must be alphanumeric (a-z, A-Z, 0-9). Underscores are allowed. All other characters and spaces are unsupported.
Click Next to select a pre-configured layout.

Set the minimum and maximum number of items that the system should recommend. For example, if the minimum number is one and the maximum number is four, the system will return at least one product recommendation, but no more than four recommendations. If you always want the placement to return four items, set both the minimum and maximum to four.
When the personalization engine fills this placement with recommendations, it will select an appropriate strategy based on the context of the user and page. Associated to each strategy is a message (the text above recommendations describing why they were recommended). Each strategy can have a standard or alternate message. Messages are managed on the Strategies page. Be sure to save your settings.
Layouts
Layouts define the template to be used when a recommendation is returned for a placement. For a placement to return recommendations or promotions, it needs to have a layout associated to it. Typically, layouts define the HTML structure of the recommendation or promotion, but they can also contain JavaScript or JSON data.
Adding Layouts
Multiple layouts can be added to one placement. The system will select the appropriate layout depending on how they were set up by your Client Services Engineer. Once layouts are configured by your Client Services Engineer, you can add these layouts to each placement by clicking Add Layout. Follow the instructions from the step above.

Editing or Deleting Layouts
Click the pencil icon to modify the layout settings. Use the X to remove the layout from the placement.

Enabling or Disabling Layouts
Enable or disable layouts by clicking "Enabled" under the Status column. The placement will contain an orange bar, indicating that it was modified and still needs to be published. Once published to production, the orange bar will disappear.

Managing Placements
Deleting Placements
Before deleting placements, ensure that they are not being used on the production site. If an active placement is deleted, recommendations will not show on the site when that placement is requested.
Publishing Placements
When you create a new placement, it is automatically enabled in QA. If you do not know the details of your QA environment, please contact your Client Services Engineer. When you are satisfied with the placement settings, click the “Publish all” button to activate them on your production site (or click the "Publish to Prod. button to individually activate placements).

Color Key
-
Orange: Modified, unpublished
-
Gray: Deleted, unpublished
-
Green: Added, unpublished
-
No color: Published to production
